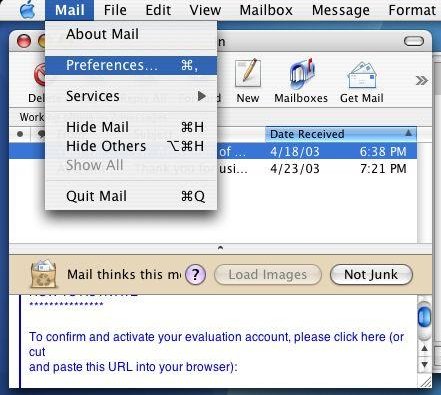
To add new e-mail account settings in Mail, follow these steps:
On the Toolbar, click Mail and select Preferences from the menu.
Preferences Window:

Click the Accounts button at the top to see the screen as shown below.

Your existing accounts will be listed on the left hand side.
To create another e-mail account, click the Plus (+) button at the bottom
left as seen in the screen shot directly below: NOTE: You can also
delete accounts this way (using the + or -)
Account Information tab as seen in the screen picture directly below:
Note the following information below
needs to be entered as the "account information":
Account Type = POP
Description = enter any name for the e-mail account. This name is what you will identify your email account by.
Email Address = enter your full e-mail address.
Full Name = enter your full name.
Incoming Mail Server = pop3.pon.net
User Name = enter the username of the e-mail account (without the @pon.net)
NOTE:
Business Emails Only: (i.e. .com, .org, .net, .biz -
other) --> Your User name MUST be your full email
address. |
Outgoing Mail Server = smtp.pon.net
Note: You will only want to have one mail server setting listed in your list of Outgoing Mail Servers.
Special Mailboxes tab (see screen shot directly below):
|


